Easy Drawing Ideas for Kids Tattoo Step by Step
Is it bragging to say I am in love with this recent project? Don't you think these kid-designed DIY temporary tattoos would make a unique homemade Mother's Day gift? They are fairly easy to make (as if I would do something complicated!) and kids can make them for mom, dad or the grandparents, or maybe even sport one on their own arm!
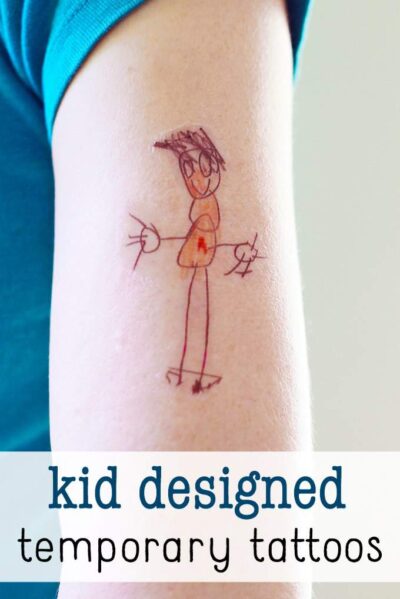
In the photo I am sporting a temporary tattoo of myself drawn by my youngest son (whose actions belie his claim "I hate art," more and more everyday). I particularly love how my skin has that photo-edited glow (thanks to the superior skills of my pal, Ana). I would like some of that in real life, please. And applied to my brow wrinkles.
But I digress. (Note: this post contains affiliate links.*)
DIY temporary tattoos: the How-To
What you need:
- Temporary Tattoo Paper
- A scanner and ink jet printer
- Cute art drawn by your kids
- Photo editing program. I use PicMonkey for crazy-awesome photo editing. You can use it for free, but I love it SOOO much that I actually pay for the upgraded service. I am super
cheapfrugal, so let me tell you that is the best recommendation you can ever get.
Step by step instructions:
1. Scan your child's artwork.
2. Open the image in PicMonkey.
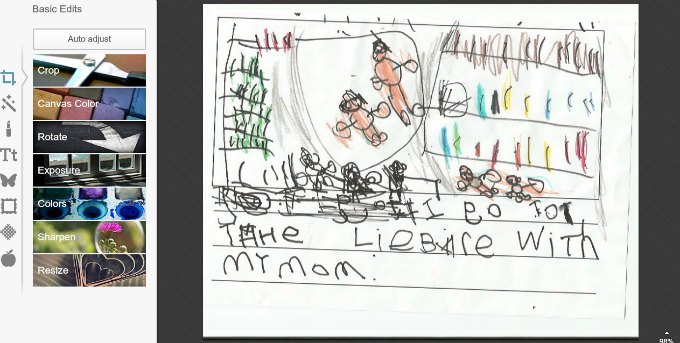
3. Crop out the portions of the artwork you want to make into a tattoo. Save as new images. Repeat for as many tattoos as you want.
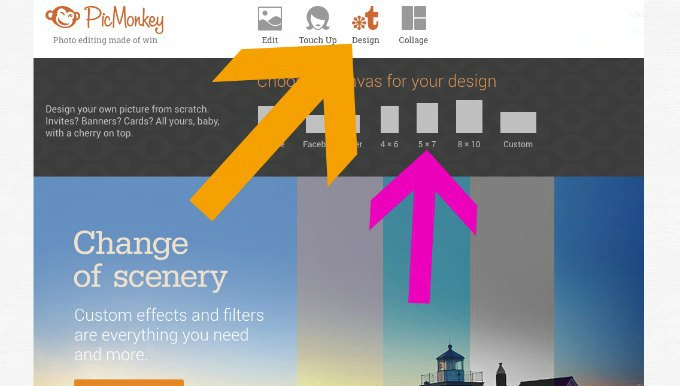
4. In PicMonkey, open a "design" (orange arrow) and choose "5x7" (pink arrow). You can actually choose whatever size design you want, this is simply what I did.
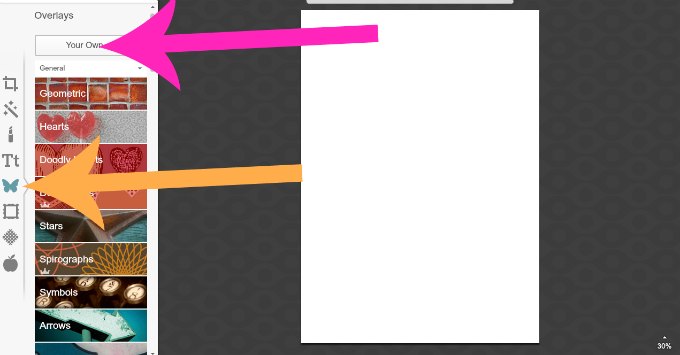
5. Open your tattoo images in PicMonkey using the overlay feature. Click on the butterfly (orange arrow), then click on the "your own" button (pink arrow) to upload your cropped images.
6. Fill the page with as many images as you wish. I suggest filling the page. You will only be able to run the temporary tattoo paper once through the printer and you don't want to waste it. Save the page of tattoos.

7. At this point I converted the picture file to a pdf file in my computer. Strictly speaking you don't have to do this, but I find it easier to get my desired results printing pdf rather than jpeg.
8. Test print the file on a piece of scratch paper! (Very important!)
9. Print out the file following the instructions enclosed with the Temporary Tattoo Paper.
10. Cut out tattoos and apply to skin, following the instructions.
11. Show off your newly decorated muscles!
TIPS:
- In PicMonkey you can lighten or darken the images. Darker images make better tattoos.
- Cut out the tattoos from the paper as close as possible to the images.
- Print out using your printers photo paper settings, if possible.
- I repeat: print a test page. Temporary Tattoo Paper is not the cheapest thing in the world!
- If you want to use words, reverse the image in PicMonkey before saving, or the word will end up backwards on your skin. (I *may* have first hand experience with this....)
I know you are now thinking about which artwork you want to decorate your body with! DIY temporary tattoos are so much fun and of course the possibilities are endless. These would make great Mother's Day or Father's Day gifts, but you could also make them for themed birthday parties or special events.
The most awesome benefit, however, is the rush of joy your child will feel when you demonstrate to him that you love his creativity so much you want to wear it on you body.
Enjoy!
*This post contains affiliate links to the products I used to create this project. That means if make a purchase through the affiliate link I may earn a small commission.
Reader Interactions
Source: https://www.whatdowedoallday.com/diy-temporary-tattoos-designed-by-kids/
0 Response to "Easy Drawing Ideas for Kids Tattoo Step by Step"
Post a Comment